Dragon Brew: Unboxing

I just received my Kickstarter copy of Dragon Brew – Make Beer, Not War from August Games.

Here’s how it looks:

Previous Image
Next Image

info heading

info content


Here’s a video by Daniel George that shows how to play the game:

Making clang default compiler in Ubuntu

I recently upgraded my Ubuntu 16.04 LTS to a pre-release of Ubuntu 17.10 since it comes with recent compilers. The clang compilers currently create faster binaries than gcc does. Also I wanted to use latest C++ features since I started playing around with libint (electronic integrals library) again.

With a new compiler, I want to be able to easily switch back. Here’s what worked for me:


sudo update-alternatives --install /usr/bin/cc cc /usr/bin/clang-5.0 100
sudo update-alternatives --install /usr/bin/c++ c++ /usr/bin/clang++-5.0 100

C#: Finding consecutive list items violating an upper or lower limit

Here’s some code I have written today to find segments of a list that violate upper or lower limits. The minimum size is given as a parameter.

I know there are more elegant ways to do this, but the scripting language that I used features only a subset of C#, that is why I had to keep it simple, e.g. without Predicate.

[code]
var sequence = [0.25,0.5,0.5,0.5,0.7,0.8,0.7,0.9,0.5,0.5,0.8,0.8,0.5,0.5,0.65,0.65,0.65,0.65,0.65,0.65,0.65];
double lowerLimit = 0.1;
double upperLimit = 0.6;
int minWindowLength = 3;

// return type is a list of lists
var windows = [[0.0]];
windows.Clear();

int consec = 0;
int index = 0;

while (index < sequence.Count){

// store segments here
var window = new System.Collections.Generic.List<double>();

while ((index < sequence.Count) && (sequence[index] > upperLimit || sequence[index] < lowerLimit)) {
window.Add(sequence[index]);
consec = consec + 1;
index = index +1;
}

if (consec > minWindowLength) {
windows.Add(window);
}

window = new System.Collections.Generic.List<double>();
consec = 0;

index = index+1;
}

return windows;
[/code]

Converting Microsoft Word Files (doc, docx) to reStructuredText (rst)

This article describes how to convert Microsoft Word documents to reStructuredText. Everything should be done within a temporary directory with simplified filenames. So let’s assume you want to convert ‘am.docx’ to reStructuredText. The Word document can contain images.
You need:
A few simple steps:
  1. On the command line (either the old cmd or the PowerShell) go to the temporary directory that contains the Word document (e.g. C:\temp):
    cd c:\temp
  2. Convert ‘am.docx’ to ‘am.rst’ using pandoc
    pandoc.exe -f docx am.docx -t rst -o am.rst
  3. Extract the media files (e.g. images) from the Word document
    unzip .\am.docx

    and move it to current working directory

    mv .\word\media .
  4. All image files should be in the same file format, so convert eml and gif files to png.
    cd media

    to jump into the directory

    dir (to list all files)

    a) Either by hand:

    convert .\image2.gif .\image2.png
    convert .\image1.emf .\image1.png

    b) Or automatically by using mogrify (also part of ImageMagick):

    mogrify.exe -format png *.emf
    mogrify.exe -format png *.gif

    And clean up:

  5. rm *.gif
    rm *.emf
  6. Do not forget to search and replace .emf and .gif with .png in the .rst file with the editor of your choice (gvim or notepad++)
  7. Check the build by creating a quick Sphinx:
    run sphinx-quickstart (and follow the instructions)
    copy the file over the main doc in the source dir
    copy the media folder to source
    run “make.bat html” to create the a website and check the result.

Boosting OwnCloud’s Performance with APCU on Ubuntu with Plesk

Memcaching boosts the performance of OwnCloud dramatically. Read about this here. My server is running Ubuntu 12.04 LTS. PHP 5.6 and 7.0 is handled by Plesk. In my experience 5.6 is the most stable running with OwnCloud. APCU is supported by OwnCloud but was not present as a module in PHP (Only on the Sytem providing PHP 5.4). So here’s how you install it.

This is a follow up to my previous post on installing custom modules for PHP handled by Plesk. So I assume that all required software to build the modules is installed.

No ACPU module available

For PHP 7.0 simply run:

$ /opt/plesk/php/7.0/bin/pecl install apcu

PHP 5.6 is a bit more stable for running OwnCloud. However you will get an error that you need at least PHP 7.0 for installing ACPU. This is true for the current release (>5.0). So simply install the stable 4.x release:

$ /opt/plesk/php/5.6/bin/pecl install apcu-4.0.10

Register the module with PHP:

For PHP 7.0.x:

$ echo "extension=apcu.so" > /opt/plesk/php/7.0/etc/php.d/apcu.ini

For PHP 5.6.x:

$ echo "extension=apcu.so" > /opt/plesk/php/5.6/etc/php.d/apcu.ini

Reread the config:

$ plesk bin php_handler --reread
ACPU module available

Now the only thing left is to add

'memcache.local' => '\OC\Memcache\APCu',

to your configuration file of OwnCloud (e.g. /var/www/owncloud/config/config.php).


Running Custom PHP Modules in Plesk on an Ubuntu Server: MemCached

This article is inspired by https://devblog.plesk.com/2015/08/adding-custom-php-modules-in-plesk/. It was written for CentOs/Fedora/RedHat servers having yum instead of apt. I run Ubuntu 12.04 LTS on a virtual server. Among other applications I host WordPress and OwnCloud here. Plesk allows to use newer PHP versions (5.6.x and 7.0.x) instead of the dated one (5.4.x) that comes with my old Ubuntu.
No MemCached module available
Here are the necessary steps:
  1. Install required packages to compile modules for PHP
    $ apt-get install gcc build-essential plesk-php56-dev plesk-php70-dev libmemcached-dev libmemcache0 zlib1g-dev

    Be aware that there may be some other packages that you need to install that I did not list here since they probably were already installed on my server. If you run into missing headers this might be an indicator for that.

  1. Install the memcached module:
    $ /opt/plesk/php/5.6/bin/pecl install memcached
  2.  You will be asked for the “libmemcached directory [no] :”
    The default is “no”. If you have no need for sasl answer:

    no --disable-memcached-sasl

    If you need memcached with sasl2 support you can install it manually following this advice.

  3. After the installation is finished you need to register the module with Plesk:
    $ echo "extension=memcached.so" > /opt/plesk/php/5.6/etc/php.d/memcached.ini
    $ plesk bin php_handler --reread
MemCached module available

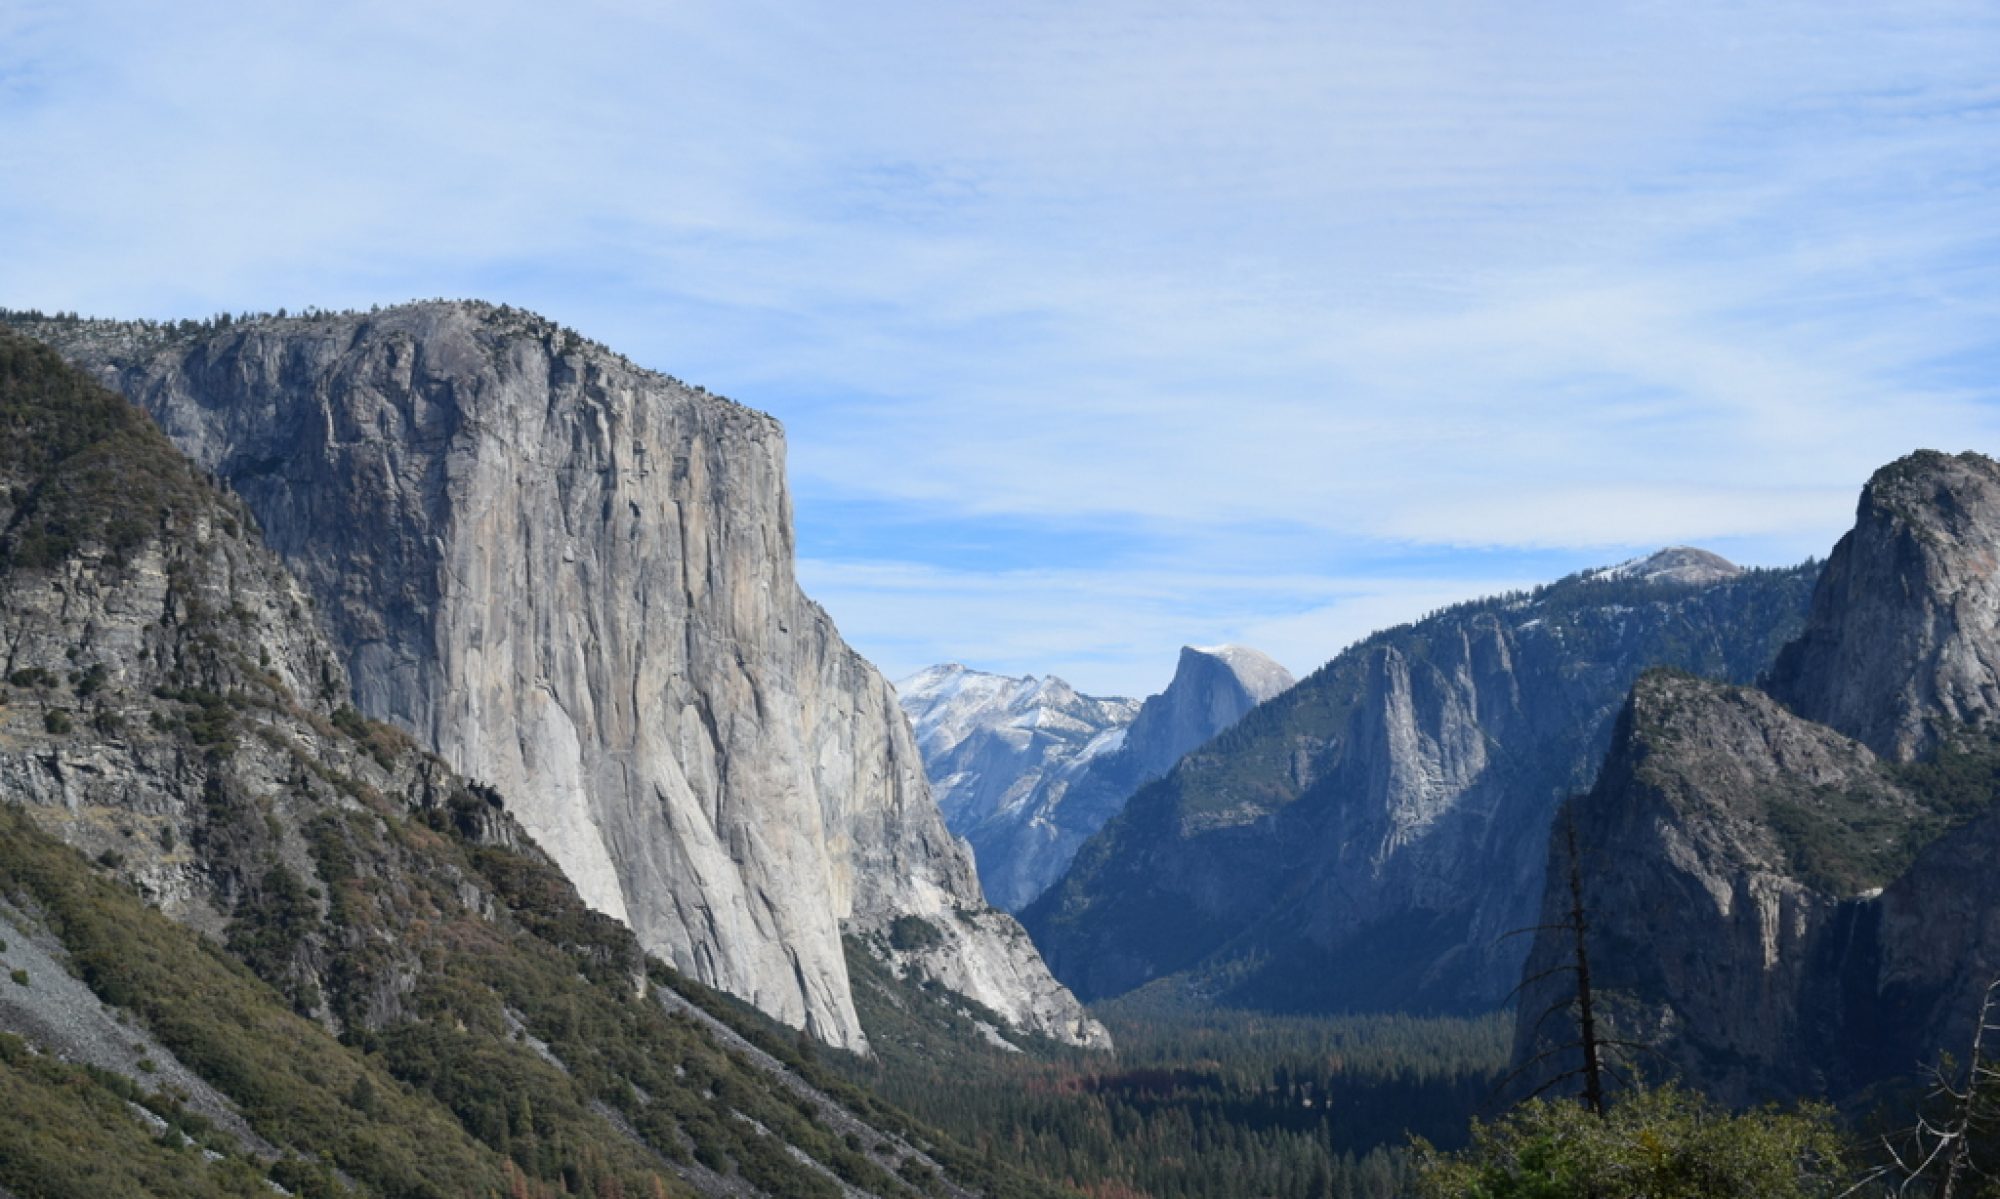
Hiking & board games @Yosemite

Last weekend we visited Yosemite National Park. What a great place to hike. Of course we brought some board games. I just wanted to share some advice and impressions.
20151107_100252

  • If you drive to Yosemite from San Francisco International Airport, a great place to stay is Yosemite Gold Country Lodge in Coulterville. This place is run by Ken, a really nice guy who invited us to his farm. The rooms are spacious, feature a fireplace (gas) and a fridge. Outside there is a grill. So you can get some meat from the store and have a BBQ at night.
    20151107_085418 20151107_085423 20151106_181636 20151109_110347 20151109_111625
  • From there it only takes about one hour to get to the entrance of Yosemite and about two hours to get to the trails. Probably longer due to taking pictures along the road.
    DSC_0093-002 DSC_0131-002 DSC_0127-002  DSC_0188-002
  • Hotels inside the park are expensive. But you can get a heated tent at a reasonable price at Camp Curry. But be prepared: It can be quite cold in November! But you wake up to an amazing view.
    DSC_0785 DSC_0714 DSC_0709 20151109_070719 20151109_065112 20151109_065108
  • Just right outside the park, at El Portal, there are a few Hotels where one can get a deal through Expedia. We stayed at the Cedar Lodge. But: No free Wifi, , no coffee, etc. But the rooms are ok. However, the food at this place is supposed to be pretty bad if you believe TripAdvisor ratings. It was supposed to be better at next to the hotel Yosemite View Lodge: The River Restaurant & Lounge. So this is where we went. The salad bar was great. Lynns Burger was burned (really totally black) at their first try, but she sent it back and got a good one quickly.
    DSC_0142-002
  • Getting food (some cheese, bread, juice and milk) for the hike at a local grocery store is probably the best option.
    DSC_0344-001 DSC_0348-001 20151108_094334 20151108_094326
  • Some of the hiking trails are paved with asphalt to be accessible for everybody. Some are a bit more difficult and go into the wilderness. The best way to select one that suits your skills is the Chimani Yosemite App. It is available for Android and iOS. They also have an app that features all National Parks in the USA. I really recommend getting it! The links point to the Android version in the Google Play Store since I do not have any iOS devices.DSC_0251-001 DSC_0270-002
    DSC_0255-002 DSC_0327-002
  • Wildlife in Yosemite Valley is not so wild anymore.
    DSC_0166-001 DSC_0763 DSC_0778 DSC_0801
  • Bringing some games along is a must for every board game fanatic! It is just a lot of fun playing in such a great environment. This time we brought Tash Kalar: Arena of Legends by Vlaada Chvátil (Czech Games Edition), Tiny Epic Galaxies by Scott Almes (Gamelyn Games) and Star Realms by Robert Dougherty and Darwin Kastle (White Wizard Games). All of theses games are very portable. For Tash Kalar I just carry the game board, cards and chips. Tiny Epic is tiny anyway and Star Realms is just a deck of cards.
    DSC_0536 DSC_0543 DSC_0564 DSC_0572 DSC_0567 DSC_0577 DSC_0292-002 DSC_0560 DSC_0556 DSC_0421-001 DSC_0418-001 DSC_0416-001 DSC_0407-001 DSC_0401-001
  • On the way back to San Francisco we stayed at Ken’s Motel again. Tiny Epic in the hotel room…
    DSC_0932 DSC_0931 DSC_0930  DSC_0928
  • Enjoy!
    DSC_0382-001 DSC_0376-001
    DSC_0522DSC_0520DSC_0519DSC_0518DSC_0517DSC_0516DSC_0515DSC_0383-001DSC_0363-001DSC_0768-001DSC_0798-001DSC_0806DSC_0815DSC_0819DSC_0829DSC_0867DSC_0897DSC_0899DSC_0292

The DFT Song

Years ago I attended a summer school in Denmark on Density Functional Theory (DFT) and the use of the Atomic Simulation Environment (ASE) and the GPAW code. Kieron Burke (for those of you who don’t have a clue: he’s the “B” in PBE) was one of the invited speakers. He’s a great scientist but also a fantastic entertainer.
Towards the end of the poster session, he announced another lecture taking place immediately. And he said it was mandatory to attend! So everybody went back to the lecture hall and sat down. While stating that you have to “sing along if you want any more beer” he started a presentation with the lyrics of the DFT song (which he had written together with Volker Blum) and everybody sang along to the tunes of “Let it be” by The Beatles.
I pulled out my smartphone and took pictures of the slides. So here are the lyrics… get a karaoke version of the song and sing along!
Feel free to add new verses in the comments!
 

The DFT Song

Written by Volker Blum and Kieron Burke

To the tune of “Let It Be” (with apologies to John and Paul)

When I find my model’s unpredictive,
Walter Kohn just comes to me,
speaking words of wisdom,
DFTee.
And in my hour of code-debugging,
he stands right in front of meee,
saying “you just gotta learn
your chemistree”.
LSD, PBE,
B3LYP, hee-hee-hee.
Which approximation should I use,
in my DFT?
And when I find my state’s degenerate,
I turn next to Mel Levy
Constrained searches work the best
for formality.
In LDA I have some faith,
if my system’s running free
But LDA can never give
A dis-Cont-inuit-eee.
DFT, convexity,
Not Thomas-Fermi, nor Hartree-ee
Exact conditions tell the truth,
no fitting need there be.
And in my hour of darkness,
with van-der-Waals in front of meee,
my graphene comes out bad,
with stupid PBEee.
But now there’s Langreth-Lundqvist,
doing even ATPee,
let’s all go to medical conferences,
running DFTee.
DFT, DFT,
DFT, DFTee.
I can always find a functional,
to make it all agree.
But when my band gap’s tiny,
far to small to see,
I don’t like your answer,
DFTee.
For though it may be parted
with hybrid E-X-Cee,
Can I trust my answer,
in realitee?
DFT, DFT,
DFT, DFTee.
I thought you were first principles,
DFTee.
And when the broken-hearted gap,
opens up to full degree,
How’ll I get the answer,
tell me DFTee?
For though the band gap may be parted,
there’s a chance that you will see:
GW is the answer,
thank you Rex Godbee!
Many bod-eee, not DFT,
Many bod-eee, no densitee,
this must be the answer,
on which we’ll all agree!
And when I’ve found the structure,
there’s still a light that shines on me,
So Walter wont let me use,
ground-state DFTee.
To find the optical spectrum,
while staying p’rameter-free,
We must ask a little Gross,
the one called Hardeee.
DFT, 123,
now TD-, DFT
Let’s get excitations,
with more skulduggeree.
DFT, DFT,
DFT, DFTee.
It’s the weirdest physics,
but makes great chemistreee!
Building a Custom Kernel (3.14) on Ubuntu (Raring, Saucy, Trusty)

Kernel 3.14 was released yesterday. I use this as an opportunity to show you how to build a custom Linux kernel on debian based distributions. It should not really matter which version or distribution one you are running as long as it is based on Debian (I am running the beta version of Ubuntu Trusty Tahr).
The important point is that you use a method that directly creates .deb packages, so that you do not have to worry about uninstalling manually.
But why should you upgrade the kernel anyway you might ask. Well, maybe you shouldn’t, except if you really need one of the new features (like the new scheduler in this release). Or just because you can.
You have to do all steps as root or you can just type “sudo bash” or “sudo zsh” to open a bash or zshell with superuser privileges.
First you need to install the dependencies. Please let me know in the comment section if I forgot something. This step is not shown in the screenshot since I have all the stuff on my system anyway.
apt-get install wget bzip2 kernel-package build-essential
Then go to the system source directory, download and extract the latest release. The wget link in the example refers to version 3.14, but you can simply replace the link to any desired version. Then change into the directory that was created.


cd /usr/src
wget --no-check-certificate https://www.kernel.org/pub/linux/kernel/v3.x/linux-3.14.tar.xz
tar xf linux-3.14.tar.xz
cd linux-3.14


Take over the configuration from the kernel which is currently installed on your system.

make oldconfig


The new features and settings have to be adjusted manually. So you will be asked about them. If you have no idea what it is about it is just safe to take the default by pressing enter.


You can adjust the settings afterwards by typing “make menuconfig”. This will bring you to a ncurses based menu where you can change all kernel settings. The default for almost all modules of the kernel is to build them, but load only the necessary modules.  I recommend disabling kernel modules that you do not use at all. This will speed up the compilation. For example I do not use a remote control (IrDA module) on my desktop or amateur radio, so I just disable the building of the modules (changing <M> to < >).

Then it is time to build the kernel and create deb packages for the image itself, the headers and the source.

make-kpkg --initrd --append-to-version=-custom 
kernel_image kernel_headers kernel_source


This will take some time. After the compilation is finished .deb files are automatically created (located at /usr/src). Install them and you’re done 🙂


cd ..
dpkg -i *.deb


On the next boot Linux automatically uses that kernel image as default. You can always check for the kernel version by typing “uname -a”.
Cheers, Michael